
Rocky Mount, VA Duct Services: Replace Ductwork in Walls & Attic


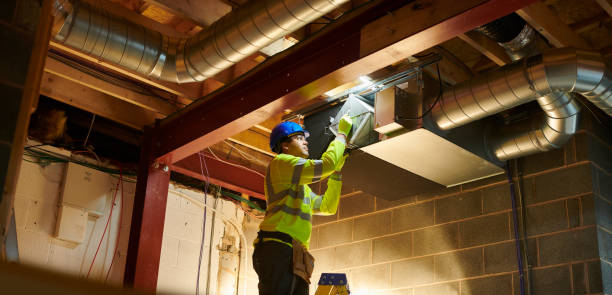

If you need to replace ductwork in existing walls or upgrade leaky attic runs, you want a plan that avoids unnecessary demolition and delivers real comfort gains. In this guide, you will learn how to replace ductwork in existing walls and attic spaces the right way, including code basics, smart material choices, and local tips for Virginia homes. When you are ready, our NATE-certified team can inspect, design, and install with minimal disruption.
When should you replace ductwork instead of repairing it?
Most systems can be sealed or re-hung, but replacement is the smarter choice when you see these signs:
- Crushed or disconnected sections, often found where attic paths change direction.
- Persistent comfort imbalance between rooms after basic sealing and balancing.
- Mold, soot, or rodent contamination that makes cleaning unsafe or uneconomical.
- Uninsulated or under-insulated metal trunks in a hot attic causing condensation.
- Major layout changes after a remodel or equipment upgrade.
Energy Star reports many homes lose 20 to 30 percent of air through leaky ducts. If your blower runs long and rooms still feel stuffy, replacement and re-design may be the fastest fix.
Can you replace ductwork inside finished walls without wrecking the house?
Yes, in many cases. Returns and small supplies often run inside interior walls, chases, or dropped soffits. The key is to use the paths the house already provides and to open the fewest precise access points.
How pros map existing duct runs in finished spaces
- Use static pressure readings, flow hoods, and thermal imaging to trace weak runs.
- Locate vertical chases that stack from the basement or crawlspace to the attic.
- Verify cavity depth and obstructions with inspection cameras from switch box openings or baseboard cuts.
- Confirm framing type. Many Roanoke Valley homes have older plaster and lath that need careful dust control.
Selecting the right duct type for tight cavities
- Sheet metal with internal liner for vertical chases that need rigidity.
- UL 181 listed flex for short, gently curved connections. Keep runs straight, with tensioned inner liner and proper strap spacing.
- Ovalized metal for narrow stud bays where round pipe will not fit.
- Properly sized return-only cavities with a continuous metal backer. Building cavities cannot be used as supply ducts.
Best practices for attic duct replacement
Attics in Salem, Vinton, and Martinsville can hit extreme summer temperatures. Poorly insulated ducts waste energy and condense moisture.
- Insulation levels. In many climates, energy codes require R-8 insulation for ducts in unconditioned attics and at least R-6 in other unconditioned spaces. Upgrading to R-8 on supply and return trunks is a safe target.
- Airtight sealing. Seal all metal seams, takeoffs, and boots with UL 181 mastic or mastic-rated tape. Do not rely on cloth duct tape.
- Correct support. Strap flex ducts every 4 feet with 1.5 inch wide supports and maintain gentle 1 duct diameter bends.
- Short, direct runs. Keep total effective length as low as possible. Every elbow adds resistance and reduces room airflow.
- Bury or encase ducts. After sealing, many homeowners add blown-in insulation over attic ducts to reduce heat gain. Verify vapor barriers and clearances for recessed lights before burial.
- Boot and grille sealing. Foam and mastic the boot-to-drywall joint to stop attic air from entering rooms around the grille.
Step-by-step: replacing a wall-cavity return or supply
Every home is different, but the flow below shows how pros limit damage while restoring performance.
- Plan and permit
- Confirm sizing with Manual D or an equivalent load-based method.
- Pull any required local permit and schedule inspection points.
- Find the path
- Trace the current run from the equipment to the register with cameras and scanner tools.
- Mark stud locations to avoid electrical, gas, or plumbing lines.
- Create surgical access
- Cut small, repairable openings near the baseboard and at the top of the wall or in the closet behind the chase.
- Set dust control. Cover returns and doors to protect finished spaces.
- Remove the old duct
- Disconnect at the boot and at the trunk. Cap openings to keep debris out of the system.
- Dispose of contaminated or damaged sections safely.
- Install the new section
- For metal ducts, assemble with S-cleats and drive connectors. Seal all joints with mastic.
- For flex connections, fully seat the inner liner past the bead, zip tie, then mastic. Pull the jacket tight and tape the vapor barrier.
- Fire-block and seal the chase
- Where a duct passes between floors, add fire blocking and smoke seal per code.
- Foam and mastic around boots and plates to stop air leakage.
- Insulate and test
- Wrap to the correct R-value. Do not compress insulation at supports.
- Measure airflow at the register and confirm static pressure at the air handler.
- Patch and finish
- Close access openings with drywall, prime, and paint. Clean and vacuum work areas.
Tools and materials pros rely on
- UL 181 mastic and pressure-sensitive tape
- Lined or galvanized sheet metal, oval pipe, and listed flex duct
- Manual D software and ductulators for sizing
- Flow hood, manometer, and thermal camera for verification
- Insulation wrap, hangers, saddles, and code-required fire blocking
Codes, permits, and safety you should know
- Duct construction and sealing are covered in the International Residential Code under Section M1601. Return air openings are addressed in Section M1602. These sections require listed sealing methods and prohibit using cavities as supplies.
- Energy codes commonly require R-8 insulation for ducts in unconditioned attics and at least R-6 in other unconditioned spaces. Local enforcement may vary, so confirm at permit intake.
- UL 181 rated mastic or tape is required for sealing. Standard cloth duct tape is not permitted.
- Smoke and fire blocking is required when ducts pass between floors.
- Always pull permits where required and schedule inspections. This protects resale value and safety.
What does duct replacement cost in the Roanoke area?
Every home is unique, but typical ranges help set expectations.
- Single wall return replacement in a finished space: often a one day job, generally in the low thousands depending on access and finishes.
- Attic branch upgrades and reconfiguration: half to full day, with cost driven by number of registers and insulation level.
- Full system re-duct from plenum to rooms: multi-day project with design and balancing. Pricing varies by square footage and existing conditions.
Variables that move price up or down:
- Access difficulty and plaster or tile finishes
- Number of boots and takeoffs
- Need for new return paths to correct noise or airflow
- Insulation upgrades and code-required fire blocking
- Testing, balancing, and documentation requested by the homeowner
We provide up-front pricing after inspection so there are no surprises.
Retrofit options when opening walls is not ideal
- Add a high-low return pair in an adjacent closet and abandon a noisy wall return.
- Reroute supplies through floor cavities or soffits, then up through a corner chase.
- Use compact, rigid oval ducts to fit behind built-ins or inside shared chases.
- Improve performance without replacement by sealing, straightening, and re-hanging sagging attic runs and resizing grilles.
How Wisler manages a clean, code-compliant duct replacement
Our process prevents repeat problems and delivers verified results.
- Without Worry Comfort Check
- A NATE-certified tech measures static pressure, temperature split, and room flows. You receive a written report card that details readings, what we cleaned, what we tweaked, and any concerns.
- Right-sized design
- We apply Manual D principles and your comfort goals to select materials and pathing. We reduce elbows, correct return sizing, and specify R-8 insulation in unconditioned attics.
- Clean, safe worksite
- Background-checked techs arrive in fully stocked trucks with floor protection, containment, and HEPA vacuums.
- Verified sealing and insulation
- All joints are sealed with UL 181 mastic. Boots are sealed to drywall to stop attic infiltration. Hangers are spaced to prevent kinks and sags.
- Test-out and documentation
- We re-measure airflow and static pressure and walk you through the results. Photos of hidden work are included for your records and future resale.
Why homeowners choose us in Roanoke, Cave Spring, Salem, Martinsville, Vinton, Collinsville, Hardy, Rocky Mount, Wirtz, and Goodview:
- Serving Virginia since 1986 with a 100% satisfaction guarantee
- BBB-recognized, NATE-certified team with continuous training
- Transparent, up-front pricing and clear communication
Attic-specific tips for Virginia homes
- Many older ranch homes around Roanoke have long attic runs fed from a central plenum. Splitting a long run into two shorter branches often fixes the back bedroom first.
- If you have blown-in cellulose, bury sealed ducts to reduce heat gain. Mark duct locations with rulers at the rafters for future service.
- Choose lined metal trunks for noise control where bedrooms share walls with supplies.
After replacement: maintenance that preserves performance
- Replace filters on schedule and keep returns clear of furniture.
- Have ducts inspected annually for hanger tension, boot seals, and attic pest damage.
- During your seasonal HVAC tune-up, ask for a static pressure check. Rising pressure can signal crushed or blocked ducts.
- Consider periodic grille cleaning to maintain free airflow.
When performance is measured and documented, comfort stays consistent year round.
Frequently Asked Questions
How long does it take to replace ductwork in an existing wall?
Most single wall returns or supplies take about one day with surgical openings, plus time for patch and paint. Complex multi-floor chases can extend to two days.
Do I need a permit to replace ducts in Virginia?
In many jurisdictions, yes. Duct alterations fall under mechanical permits. We handle permitting and inspections and provide you with documentation for records.
What insulation level should attic ducts have?
A safe target is R-8 for ducts in unconditioned attics and at least R-6 in other unconditioned spaces. Local energy code adoption can vary slightly.
Can I reuse existing wall cavities for return air?
Yes, if the cavity is properly lined and sealed with a continuous metal backer. Building cavities cannot be used for supply air by code.
Will new ducts fix hot and cold spots?
Often yes. Correct sizing, fewer elbows, tight sealing, and better insulation restore airflow. We verify with airflow and static pressure tests after install.
In Summary
Replacing ductwork in existing walls and attic spaces is possible with the right design, minimal access points, and code-compliant sealing and insulation. Measured performance beats guesswork, so start with testing and a clear plan. For trusted results in Roanoke and nearby cities, schedule our NATE-certified team to assess and replace what is needed.
Call to Action
Ready for tighter ducts and balanced rooms? Call Wisler Plumbing, Heating, Cooling & Electric at (540) 238-0320 or schedule at https://callwisler.com/. Ask about our Without Worry Comfort Check and get a written report with your options.
Call now: (540) 238-0320 | Book online: https://callwisler.com/ | Service areas: Roanoke, Cave Spring, Salem, Martinsville, Vinton, Collinsville, Hardy, Rocky Mount, Wirtz, Goodview
Wisler Plumbing, Heating, Cooling & Electric has served Virginia homeowners since 1986. Our NATE-certified technicians, BBB-recognized service, background checks, and 100% satisfaction guarantee back every job. We deliver up-front pricing, fully stocked trucks, and our Without Worry Comfort Check with a written report card. From Roanoke to Rocky Mount, we design, seal, and insulate ducts the right way so your home stays comfortable and efficient.
Sources12
Source links open in a new tab.
- $30 discount on standard and after-hours service-fee calls for Diamond Club members.callwisler.com (opens in a new tab)
- Bundling coupon: save 5% when combining multiple trades.callwisler.com (opens in a new tab)
- Free quote available for standby generator installation and repair services in Roanoke and surrounding areas.callwisler.com (opens in a new tab)
- Same-day, Free Estimates: Wisler offers free same-day estimates for water heater repair, replacement, maintenance, and installation (electric, gas, tankless, heat pump).callwisler.com (opens in a new tab)
- Happy comment by Malcolm Doublesgoogle.com (opens in a new tab)
- Happy comment by Liza Deckgoogle.com (opens in a new tab)
- Happy comment by Joe Comergoogle.com (opens in a new tab)
- Happy comment by Ryan Gagengoogle.com (opens in a new tab)
- Ferrum VA Plumbing, Heating & Cooling – Local HVAC and Plumbing Repair Specialistscallwisler.com (opens in a new tab)
- Roanoke, VA Heating Services | Furnace & Heat Pump Repair, Installation & Maintenance for Year-Round Comfortcallwisler.com (opens in a new tab)
- Penhook VA Plumbing, Heating & Cooling Services – Certified Technicians for All Home Systemscallwisler.com (opens in a new tab)
- FAQ'S | Wisler Plumbing, Heating, Cooling And Electriccallwisler.com (opens in a new tab)